You love the storybook charm of a Bonnie Brae Tudor, but you also want modern comfort and a smart plan for value. The challenge is doing the work without losing what makes the home special. With the right approach, you can renew systems, improve efficiency, and refresh finishes while honoring the character buyers come to Bonnie Brae to find.
This guide shows you what to preserve, how to plan, and where to invest so your Tudor feels authentic and performs like new. You will learn the key features to protect, the sequence that avoids costly missteps, and the approvals and incentives to consider in Denver. Let’s dive in.
Know your Bonnie Brae context
Before you sketch ideas, confirm whether your property is a designated landmark or within a historic district. Status affects what you can change on the exterior and when reviews are required. Even if your home is not individually designated, location within a local or national district can trigger design review.
Start by checking parcel records and then speak with Denver Community Planning and Development’s Historic Preservation staff. Early contact helps you understand permit paths and whether you need a Certificate of Appropriateness for exterior work. Build extra time into your schedule for review and be ready with clear drawings and material specs.
It also helps to connect with the Bonnie Brae Neighborhood Association. You can learn about neighborhood patterns such as setbacks, rooflines, and materials. Understanding local expectations reduces revisions and keeps your project aligned with the fabric of the block.
What makes a Tudor a Tudor
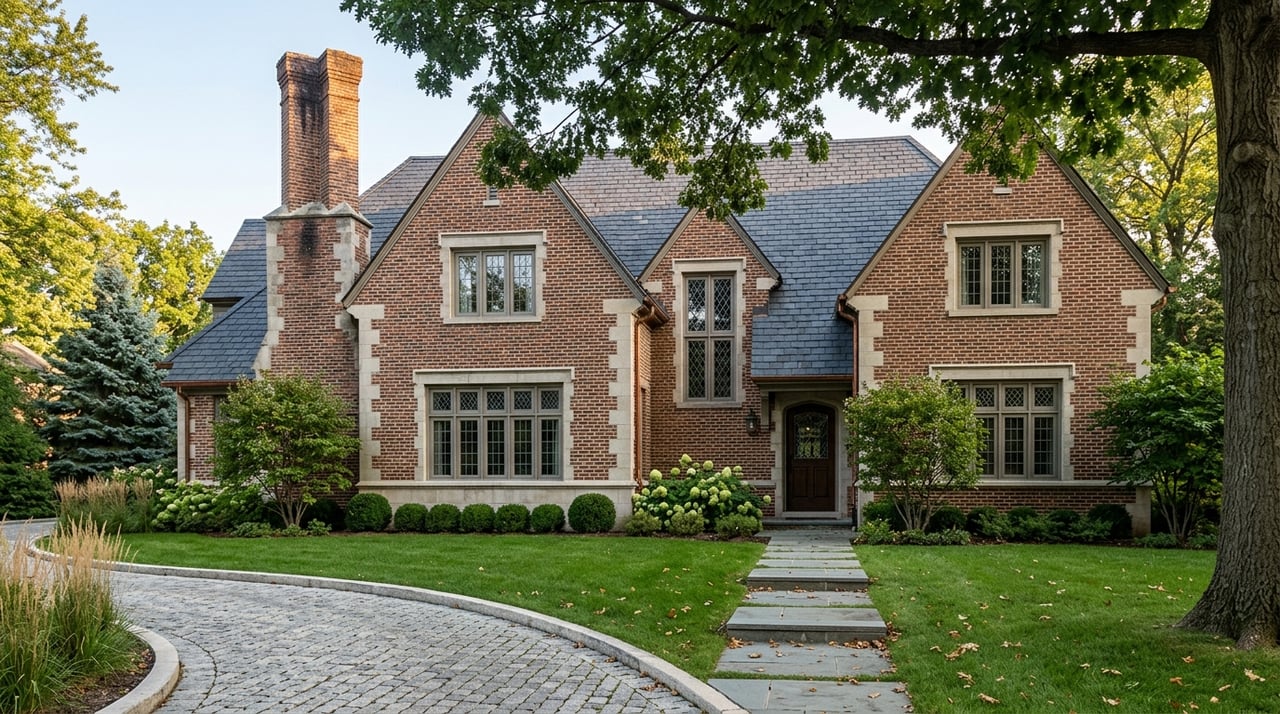
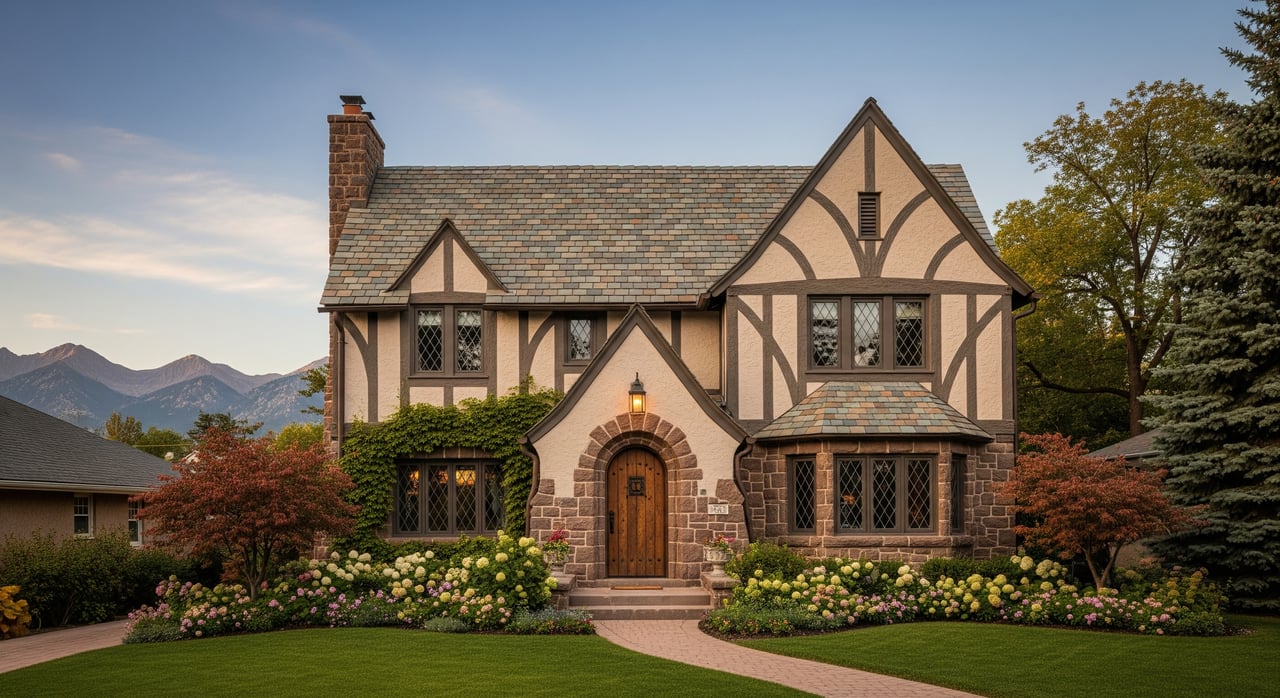
A Tudor’s value sits in its character-defining features. Preserve these first because they carry the look, feel, and market appeal of the home.
Exterior features to protect
- Steep gables and compact roof massing that set the rhythm of the street
- Slate or tile roofing profiles, sometimes simulated or composition shingles with a slate-like look
- Half-timbering with stucco infill on gables or upper facades
- Brick or stone walls and chimneys, often with decorative patterns
- Tall chimneys with corbelling or pots that anchor the facade
- Narrow, vertically proportioned windows with multi-pane or leaded glass
- Arched or Tudor-arched entries with heavy wood doors
- Carved bargeboards and substantial trim at eaves and gables
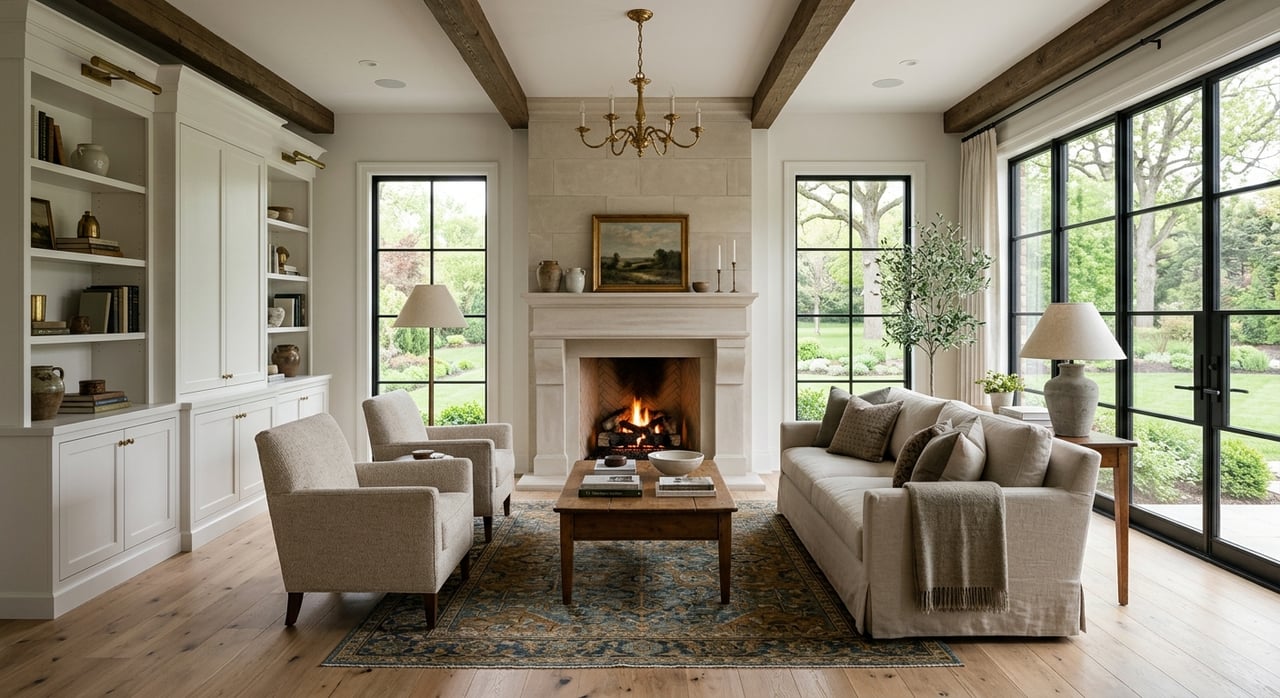
Interior features to respect
- Dark-stained millwork, built-ins, and paneled rooms
- Plaster walls and ceilings with simple molding or beams
- Fireplaces with tile or carved surrounds
- Cozy room proportions that create warmth and intimacy
Keeping these intact preserves authenticity and appeals to buyers who value the neighborhood’s historic fabric.
Use a preservation-first framework
Base decisions on the Secretary of the Interior’s Standards for Rehabilitation. The core principles are straightforward:
- Repair rather than replace when feasible.
- When replacement is necessary, match design, materials, and details.
- Keep new work compatible and, when practical, reversible.
This approach protects your investment and streamlines approvals, especially if your home is designated or within a historic district.
Prioritize the envelope
Water is your biggest risk. Address roofs, flashing, gutters, chimney caps, and drainage first so interior finishes stay dry.
- Roofing: Repair existing slate or tile where possible and reuse sound units. If replacement is required, choose materials that match the scale and profile of the original. Do not change roof pitch or add large dormers without review because massing changes can alter the home’s character.
- Flashing and gutters: Use durable metals like copper or lead-coated copper where appropriate. Keep leaders discreet and compatible with the facade.
- Drainage: Confirm foundation grading and downspout extensions to keep water away from walls and basement spaces.
A tight envelope prevents cascading damage and sets the stage for every other upgrade.
Masonry, stucco, and half-timbering
Historic masonry performs best with compatible materials and gentle treatment.
- Repointing: Test your original mortar. Many Tudors used softer lime-based mortars. A hard Portland-cement mix can trap moisture and damage brick or stone. Match the composition, color, and joint tooling.
- Cleaning: Avoid abrasive methods. Test small areas first and choose the least aggressive cleaning that works.
- Stucco: Repair with breathable mixes that match texture and color. Fix moisture sources before patching.
- Half-timbering: Repair in kind. Splice or sister new wood only where needed, and match species, dimension, and profile so repairs disappear.
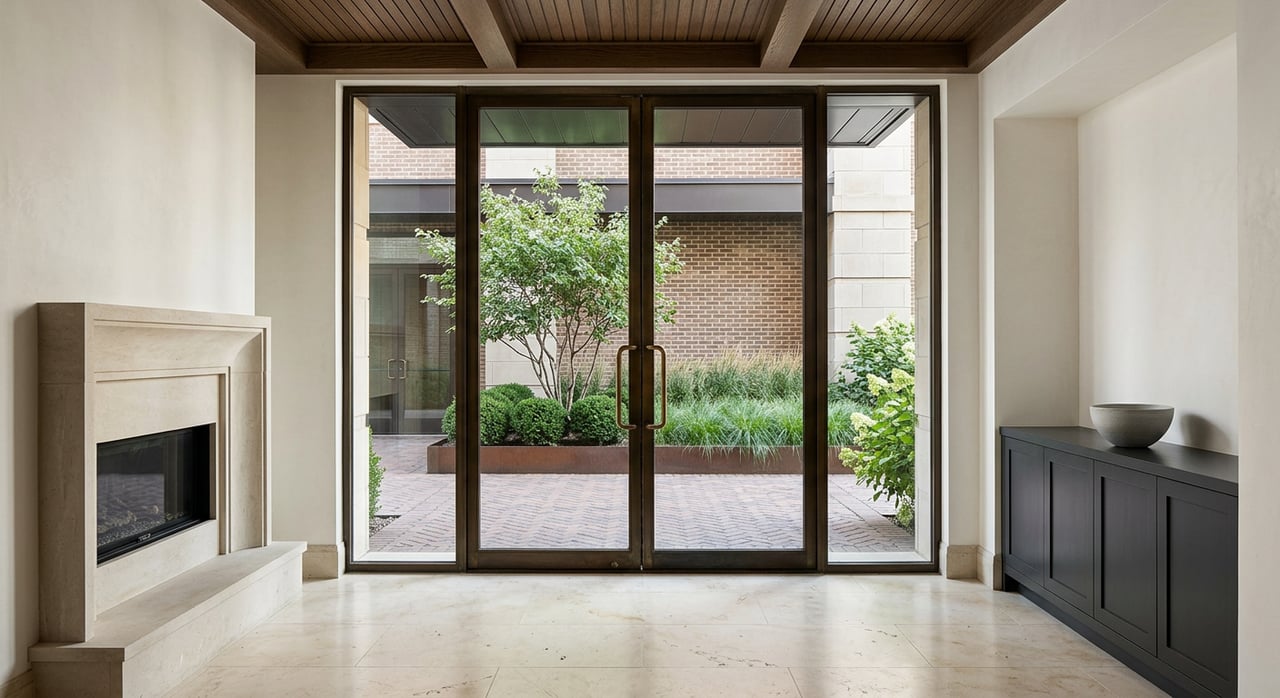
Windows and doors
Original windows are often repairable and can perform well when tuned.
- Repair first: Address sash cords, glazing putty, weatherstripping, and paint. Add interior storm windows or removable secondary glazing to improve energy performance without altering the exterior.
- Replacement when necessary: Match sightlines, muntin patterns, and profiles. High-quality wood or wood-clad units can be acceptable when they mirror the originals. Preserve leaded or decorative glass by removing, restoring, and reinstalling when feasible.
- Doors: Keep arched openings and heavy wood doors. Repair and refinish hardware in period-appropriate styles.
These choices retain the Tudor look from the street and the tactile quality you feel every day inside.
Interiors with integrity
Inside, aim to refresh rather than erase.
- Millwork: Repair and refinish original trim, built-ins, and mantels. When you must replace, copy profiles and use in-kind materials.
- Plaster: Use traditional repair methods where plaster survives. Avoid covering everything with drywall if you can save the historic plane and texture.
- Floors: Refinish existing hardwoods and match species and board widths for any infill.
These details keep the home’s soul intact while allowing modern updates where they matter most.
Comfort, safety, and energy
Modern systems can coexist with historic fabric when you plan routes carefully.
- HVAC, electrical, plumbing: Upgrade to meet current code while minimizing cuts in visible woodwork. Use basements, closets, and secondary spaces to hide ducts and lines.
- Insulation: Add attic insulation above the ceiling plane to avoid changing rooflines. Evaluate walls before blow-in insulation to prevent moisture traps. Air-seal basements and crawlspaces for comfort and durability.
- Lead and asbestos: Homes built before 1978 may contain lead-based paint. Follow EPA Renovation, Repair and Painting rules with certified contractors. Test for asbestos in older systems and materials, and use licensed pros for abatement.
Thoughtful planning here improves comfort without sacrificing character.
Permits, approvals, and incentives in Denver
Assume most structural work, window replacements, and roofing will require building permits. If your home is designated or in a local historic district, exterior changes typically need historic review and a Certificate of Appropriateness before a permit is issued. Engage with Denver’s preservation staff early to clarify submittal requirements and reduce revisions.
Plan for review time with staff or the Landmark Preservation Commission. Clear documentation, accurate profiles, and samples help approvals go smoothly.
Incentives can help in specific cases. A 20 percent Federal Historic Rehabilitation Tax Credit applies to income-producing properties that meet the Secretary’s Standards. It does not apply to primary residences. Local and state programs can change over time, so verify current options through city and state sources before you budget. Keep thorough photos, plans, and repair logs if you intend to pursue incentives.
Seller priorities for value
If you plan to sell soon, focus on visible integrity and the building envelope. These updates strengthen buyer confidence and show stewardship.
- Highest priority: Fix roof leaks and drainage, repoint failing masonry, repair entries and stoops, and restore or professionally repair the front door. Address rot, peeling paint, and use sympathetic colors.
- Mid priority: Weatherproof windows with repairs and interior storms. Clean and repair chimneys and prominent masonry. Update exterior lighting and hardware in period-appropriate styles.
- Lower immediate priority: Full interior millwork restoration, extensive plaster work, and period-accurate landscaping. These elevate authenticity but may deliver less near-term ROI.
This list keeps your investment focused where buyers notice and inspections count.
Buyer roadmap for restoration
If you are buying a Tudor to restore, a clear sequence helps control costs and protect finishes.
- Assess first: Commission a condition study and test for lead and asbestos. Document original details you want to keep.
- Sequence the work: Weatherproof the envelope first. Then upgrade mechanical systems. Finish with interior surfaces and millwork.
- Keep scope focused: Restore the most visible character-defining elements and use reversible modern interventions where possible.
This approach respects the house and your budget while giving you a comfortable, authentic home.
Choose experienced specialists
Not all contractors work comfortably with historic materials. For slate or tile roofing, window restoration, masonry repointing with lime mortars, and traditional plaster, hire teams with specific preservation experience. Ask for portfolios and references from similar-period homes, and verify certifications and insurance for lead or asbestos work.
For complex projects or those requiring historic review, consider engaging a preservation-minded architect or consultant. Require mockups for stucco textures, mortar colors, and replacement millwork so you can approve work before it scales.
Maintain for the long term
A small maintenance routine protects your investment and keeps the home market-ready.
- Clear gutters and inspect flashing each season.
- Monitor mortar joints and touch up as needed.
- Schedule periodic roof inspections, especially after storms.
- Track repaint cycles and use breathable finishes on stucco.
- Keep a record of materials, colors, and methods for future owners.
With this mindset, your Tudor will age gracefully and retain strong appeal in Bonnie Brae.
Ready to move forward?
When you renovate with integrity, you protect what makes Bonnie Brae special and position your home for long-term value. If you are considering a purchase, a sale, or a thoughtful renovation plan, we can help you align improvements with neighborhood character and market expectations. Request a Private Consultation with Unknown Company.
FAQs
Are window replacements allowed in Denver historic districts?
- Yes, but they are often subject to historic review if the home is designated or within a local district. Repair is preferred. If replacement is needed, match original profiles and muntin patterns, and consider interior storms for energy gains.
How do I match Tudor-era mortar color and strength in Bonnie Brae?
- Test the original mortar to determine composition. Many homes used softer lime-based mixes. Match color, joint tooling, and compressive strength, and complete test patches before doing full repointing.
What exterior paint colors suit Tudor homes in East Denver?
- Tudors typically favor contrast and earth tones. Light stucco with dark trim like deep greens, browns, or burgundy pairs well with exposed brick. For accuracy, consider a paint analysis.
Do Denver’s historic rules restrict interior remodels of private homes?
- Historic review generally focuses on exterior, publicly visible features. Interior changes are less often regulated unless an interior is specifically designated. Always confirm your property’s status and requirements.
How should I budget for authentic restoration versus replacement in a Tudor?
- Repair and in-kind restoration can be more labor-intensive and sometimes costlier per unit, but they preserve value and reduce long-term risks. Build contingencies for unknowns like hidden rot or deferred maintenance.